As a general rule, this is not necessarily the best approach, especially for long term sharing. Dedicated Shared Mailboxes are a better long-term approach for accessing shared content and emails. For example, if the person who shares the folder leaves the organisation, that mailbox might be deleted and along with it the shared folder. A dedicated shared mailbox – e.g. Accounts – is better because it has a specific purpose and allows emails to easily be shared and accessed by multiple people.
Tracking sharing of individual folders within a mailbox is also more challenging than tracking sharing of a whole mailbox, and you should keep a record of what you share and who with, and remove that sharing when no longer required.
However, if you have a short term requirement, it’s quite straight forward to accomplish. There are 3 steps you and your colleague need to go through in order to give permission over a folder and for them to gain access.
Share the Folder
First we need to share the folder itself. Right Click on the folder and choose Properties

Under Permissions, Add the user you want to have access. Then, set the permissions
- Read: Full Details
- Other: Folder Visible
Leave the other permissions as default (unless you want to give more than Read access)

Share the Inbox
Next, we need to share your Inbox in such a way that makes it visible, but not the contents. This is required because, in order to get to the folder you want, the person you are sharing with needs to also have access to the folders above it.
If the folder is several folders deep, you will have to do this step on all the folders above the one you are sharing.
Right click your Inbox and select Properties

This time, go to Permissions and add the same user, but set the permissions this time as:
- Read: None
- Other: Folder Visible
Leave all the other permissions as default.

Accessing the shared folder
the colleague you have shared the folder with needs to add this to Outlook manually. It will not appear automatically.
In Outlook, go to File > Account Settings > Account Settings
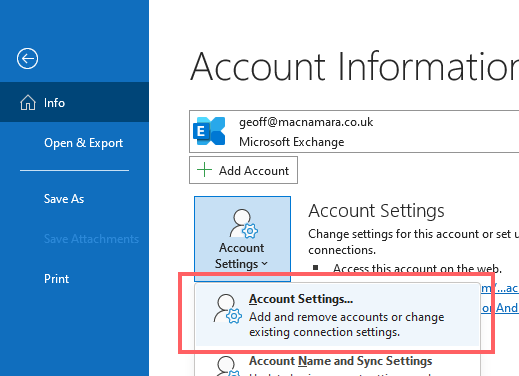
Go to Change > More Settings > Advanced > Add
Type the name of the person who has shared the folder with you, then click OK to get back to the main Outlook window.

Note that it may take a little while before the permissions have applied. Once they have you should see the mailbox, but only access the folder that was specifically shared.